Showing posts with label HTTP-PUT. Show all posts

Tuesday, June 19, 2018

Make a WCF RESTful Web Service with CRUD operations in 5 minutes

In this Step by step we Make a WCF RESTful Web Service with CRUD operations in 5 minutes 
   we see how to build a WCF REST web service with all CRUD operations to be Ajax called, all this   in just 5 minutes, following this simple steps :

1) Use Visual Studio templates and build an Ajax WCF web service
2) Customize it to support RESTful calls in JSON format (can also be XML)
3) Code all C.R.U.D. (Create Read Update Delete) operations


The whole code for this tutorial , can be downloaded from the following GitHub repository:
https://github.com/CarmelSoftware/WCF_RESTful_WebService
To build this service, we use a demo class which will be exposed by the REST service through HTTP calls, that you can later replace with your own EDM data model classes.
This an HTTP GET response from this RESTful WCF service :

Make a WCF RESTful Web Service with CRUD operations in 5 minutes
And this other is an HTTP PATCH request-response from this WCF REST service:

Make a WCF RESTful Web Service with CRUD operations in 5 minutes


Make a WCF RESTful Web Service with CRUD operations in 5 minutes


The whole process for making this REST service , is as follows :

1) Use Visual Studio templates and build an Ajax WCF web service:

First build an ASP.NET Web Application using this Visual Studio template:


Make a WCF RESTful Web Service with CRUD operations in 5 minutes


Then, add an AJAX enabled WCF web service to the project:


Make a WCF RESTful Web Service with CRUD operations in 5 minutes

You'll get the following usable skeleton for the WCF service:


Make a WCF RESTful Web Service with CRUD operations in 5 minutes


Take a look at the web.config file to see the WCF service configuration:

Make a WCF RESTful Web Service with CRUD operations in 5 minutes


As you can see , there is an endpoint which wears the name of the Web service class.
The "enableWebScript " behavior sets that the service will respond to AJAX calls.


2) Customize it to support RESTful calls in JSON format (can also be XML)

First thing we do, is to change the endpoint behavior to turn it into a REST service, using the "webHttp" directive, as follows:

Make a WCF RESTful Web Service with CRUD operations in 5 minutes

Notice that this directive replaces the "enableWebScript" one.

To make run this service, we design a demo class called "Data", which will be exposed by the REST service through HTTP calls:

Make a WCF RESTful Web Service with CRUD operations in 5 minutes

This data will be decorated with the DataContract directive, and the properties will be DataMembers.
We also add some constructors to create some records and return them by the service.
After you have your WCF RESTful service working, you will replace this demo class with some EDM data model classes of your own.
Remember to declare "serializable" your model.


3) Code all C.R.U.D. (Create Read Update Delete) operations

Then go to the WCF class and replace the "DoWork" method with the HTTP GET method to return ALL  items:


HTTP GET :

Make a WCF RESTful Web Service with CRUD operations in 5 minutes

We specify the handle for HTTP GET requests, by using the attribute "WebGet".
Also, we stipulate the response format as JSON, since the default is XML.
And we set an UriTemplate as "/Get" , which will differentiate this method from the second GET one, which will return only one item according to the ID, which you will code as follows:

Make a WCF RESTful Web Service with CRUD operations in 5 minutes
Notice that the return value is an array of Data objects and a single Data object, accordingly:


Make a WCF RESTful Web Service with CRUD operations in 5 minutes

Make a WCF RESTful Web Service with CRUD operations in 5 minutes


HTTP POST :

The POST HTTP verb is used to CREATE a new item, and we define it using the WebInvoke attribute:

Make a WCF RESTful Web Service with CRUD operations in 5 minutes

We only want to check that our REST service works, so that just return the same Data object from the request (here i'm using POSTMAN to send HTTP requests. You can also use FIDDLER for that):


Make a WCF RESTful Web Service with CRUD operations in 5 minutes

Important: the JSON object in the request's body must hold the field's data with exactly the same field names set in the DataMembers in your service: it is case-sensitive ("Id" means "Id", and no "id", got it?).

HTTP PUT:

The PUT HTTP VERB is used to update the entire item, i.e. to replace it with an updated one, and we do so by using the WebInvoke PUT option as follows:


Make a WCF RESTful Web Service with CRUD operations in 5 minutes
The binder will give you the Date object from the request, if the names of the fields being the same as the class in a case-sensitive way, and also will give you the ID of the item to update. Check that you wrote EXACTLY the same variable name for this : "Put/{id}" == string "id" .

Test this method from POSTMAN sending an PUT request with a JSON object in the body:


Make a WCF RESTful Web Service with CRUD operations in 5 minutes

Important: the JSON object inside the request's body must contain the field's data with exactly the same field names set in the DataMembers in your service: it is case-sensitive ("Id" means "Id", and no "id").


HTTP PATCH :

The HTTP PATCH verb is used in REST for updating just some of the object's fields:


Make a WCF RESTful Web Service with CRUD operations in 5 minutes


Again, test it using this REST call with the HTTP PATCH verb:

Make a WCF RESTful Web Service with CRUD operations in 5 minutes
HTTP DELETE :


Finally, create the method to handle HTTP DELETE requests, as follows:


Make a WCF RESTful Web Service with CRUD operations in 5 minutes


Make a WCF RESTful Web Service with CRUD operations in 5 minutes


THE END


That's all. Now you have a working WCF RESTful web service , and you can replace the Data model with your own.


      by Carmel Schvartzman


כתב: כרמל שוורצמן


Sunday, March 1, 2015

How to send an HTTP PUT Request to a RESTful ODataController Web API Service using Postman

In this post we'll learn Step by step how to send an HTTP PUT Request to a RESTful ODataController Web API Service using Postman
We'll make use of the Postman tool to test a RESTful OData Web API , sending an HTTP PUT request. That  working OData Web API with ODataController , was built in a previous tutorial. After we update the  record , we check it sending an HTTP GET request :

how to send an HTTP PATCH Request to a RESTful  ODataController Web API Service using Postman


Important : An HTTP PUT request is expected to provide an object to be UPDATED , but the object MUST include all of the object's properties , not just the updated ones . If you want to send a PARTIAL object , you must use the HTTP PATCH verb instead . We explain it in this HTTP PATCH tutorial .

If you do not have Postman installed , just go to the Tools >> Extensions on the Chrome browser , make a search for "Postman" and install the App .

HTTP PUT Request to a RESTful ODataController Web API Service using Postman


Now let's check out how to call the OData Web API : in MVC , to setup  the ODataController there have to be an ODataModelBuilder at the "Register" method called from the Global.asax :  the EntitySet name MUST be called after the name of the Controller ( "Notes" in our case ) , so we'll search for a "NotesController" at the application :

Notice there is a route prefix declared ( "ODataV4" ) , which must be appended to the URI . 


Found the ODataController , now we look for the "Put" method , because we're sending an HTTP PUT request :


Why to check this ? Because we want to know which parameters is expecting the ODataController  :   it expects :
1) a "key" which is the ID of the item : must be in the URI
2) a "Note" object , which must be included in the request's body ( "[FromBody]" ) . 

How do we create a Note object ? Take a look at the declaration inside the Model :


Now we know the Note's properties and its constraints.

Alternatively , you could ask for the METADATA info , but that way you won't know the Data Annotations constraints declared at the Model :

http://localhost:21435/ODataV4/$metadata

The Port  can be obtained from the Web tab at the application properties:


Merge all of this together , and you will have built the URI for the PUT request : "http://localhost:21435/ODataV4/Notes(5)" :

Set the URI , select the PUT method , set the "Content-Type" header , and write the JSON object according to the Note's declaration:


Important : because the OData protocol is case sensitive , if you type "notes" instead of "Notes" , you will not reach the data.


Send the request : as you see , the Controller has bound the JSON object to a local Note variable :


The details of the HTTP PUT request can be seen in Postman as follows : 


 The update was made , and an HTTP GET request can verify that :


That's all... 
In this tutorial we've learned how to send an HTTP PUT Request to a RESTful  ODataController Web API Service using Postman.
Happy programming.....
      By Carmel Shvartzman
כתב: כרמל שוורצמן


Saturday, November 29, 2014

Step by step how to send an HTTP PUT Request to a RESTful WCF Service using Fiddler

In this post we'll learn how to send an HTTP PUT Request to a RESTful WCF application using Fiddler
We'll use Fiddler to test an RESTful WCF application, sending an HTTP PUT request. We'll start with a working WCF application,  and we'll update an entry using Fiddler, showing as follows :


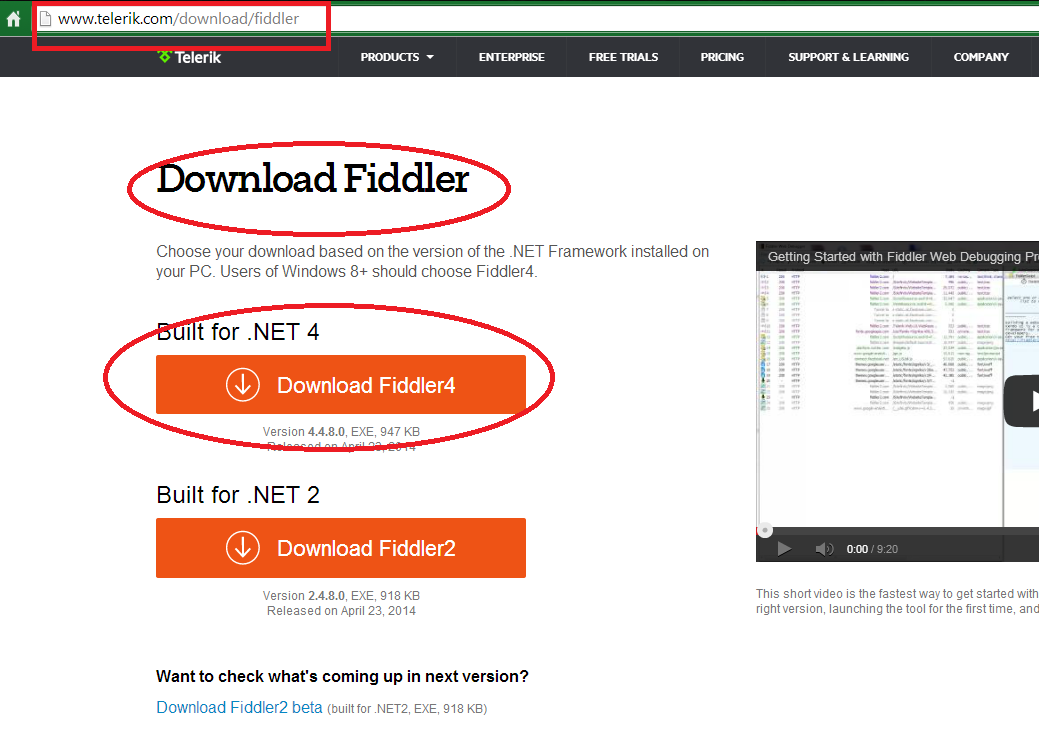
First of all, we have to download the FREE Fiddler tool from this web site :


After installing it , study the settings of the Operation Contract at the WCF Service Contract, in order to fill exactly what it is expecting as a request:
http put request to restful wcf using fiddler

The WebInvoke handles the PUT HTTP verb, and the request format must be JSON, and so the response format. Therefore, we'll send exactly what the WCF wants.
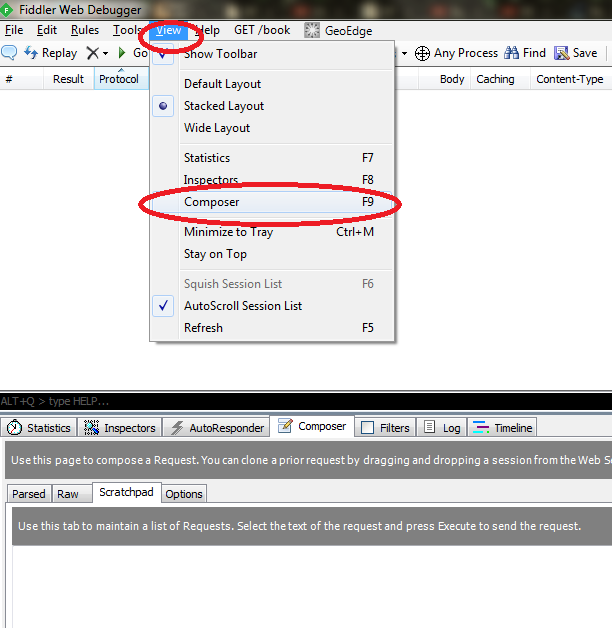
Open Fiddler and click the "Composer" option:


Then type in the URL and select "PUT" HTTP request method from the list. Also, set the request Headers as follows: (don't worry about the Content-Length, because Fiddler will fill  it for you):


Also, fill the Request Body :  be careful to fill adequately the field names of the Entity you want to update, most of all, the ID of the record to change.

Press the "EXECUTE" button at the Fiddler Composer, to send the request. If you set a breakpoint inside the WCF HTTP PUT handler, you'll see the bindings in action :


As you see, WCF succeeded at binding the JSON it got with the Blog object expected.
The response is then sent to Fiddler, with an "true" value:


And the database shows the updated values:


If you want to take a look at the RESTful WCF which we're using here, see this tutorial.

That's all... 
In this tutorial we've learned how to send an HTTP PUT Request to a RESTful WCF application using Fiddler. 
Happy programming.....
      By Carmel Shvartzman
כתב: כרמל שוורצמן


Friday, September 19, 2014

Create an Ajax Web Client for OData Web API RESTful Service - HTTP-PUT JSON


In this article we'll create a web client for updating a record by sending an HTTP PUT request via Ajax to an Web API OData RESTful service using the ODataController. We'll build the full-update form by means of the Twitter Bootstrap.
To update an item, we'll send an Ajax PUT request using the OData protocol.

For this post we're using an OData Web API  built in a previous Web API ODataController tutorial. The steps for the Bootstrap's setup can be found  in this article.
The OData protocol designed for the MVC Web API using ODataControllers can be studied at the Microsoft Asp.Net site

We'll want to send an HTTP  PUT request to the OData HTTP Web API service to fully update a record. The screen to perform the Ajax PUT call will appear this way:
Ajax  OData Web API RESTful Service - HTTP-PUT JSON


First create the MVC application as an empty web site:


Import the CSS3 and javascript files  (you can see through the 2 minutes Twitter Bootstrap installing instructions here) : then, after you do so, check that you have all the required files in your app:


Take a look at the Web API ODataController class, to see the PUT( int, Note ) method that we're going to use:


You can see that the Put() action method requires a  Note object , returning an  IHttpActionResult object: a code 202 ("Accept") response if everything went right, but an error response code ("400")  if  it don't.

Ajax Web Client for OData Web API RESTful Service


Create a new html file, the web client for the OData service:


Add the references to the Twitter Bootstrap files:


Then we add an input element for selecting the KEY (int) of the item to update:

Next, we create all the DOM elements for displaying the record's details, inside  a Bootstrap panel:


This is the markup to copy-paste:

<!DOCTYPE html><html xmlns="http://www.w3.org/1999/xhtml"><head>    <title>Update</title>    <link href="Content/bootstrap.css" rel="stylesheet" />    <link href="Content/bootstrap-theme.css" rel="stylesheet" /></head><body>


    <div class="container">        <div class="jumbotron"  align="middle">            <h1>OData Web API Full Update Form</h1>            <p>Ajax HTTP GET/PUT Form to show Details & Update an item</p>            <p style="font: 900 11px Georgia;">By Carmel Shvartzman - using the Twitter Bootstrap</p>                        <p><a class="btn btn-default btn-lg" role="button">Learn more about OData Web API</a></p>        </div>

        <div class="panel panel-default">            <div class="panel-heading row">                <div class="text-muted col-xs-6">                    <h2>Message Details</h2>                </div>                <div class="text-muted col-xs-3">                    <div class="editor-label">                        ID                    </div>                    <div class="editor-field">                        <input type="number" name="ID" value="3" class="form-control" />                    </div>                </div>
            </div>            <div class="panel-body text-muted">                <div class="row">                    <div class="col-xs-6">                        <div class="editor-label">                            To                        </div>                        <div class="editor-field">                            <input type="text" name="To" class="form-control" />                        </div>                    </div>                    <div class="col-xs-6">                        <div class="editor-label">                            From                        </div>                        <div class="editor-field">                            <input type="text" name="From" class="form-control" />
                        </div>                    </div>                    <div class="col-xs-12">                        <div class="editor-label">                            Heading                        </div>                        <div class="editor-field">                            <input type="text" name="Heading" class="form-control" />
                        </div>                    </div>                    <div class="col-xs-12">                        <div class="editor-label">                            Body
                        </div>                        <div class="editor-field">                            <input type="text" name="Body" class="form-control" />
                        </div>                    </div>                    <div class="center">                        <div class="center">                            <br />                            <div class="row">                                <div class="col-lg-6">                                    <input class="btn btn-sm btn-default" value="See Message Details" />                                </div>                                <div class="col-lg-6">                                    <input class="btn btn-sm btn-default" value="Update Message" />                                </div>                            </div>                        </div>                        <br />                        <div class="alert alert-success message"></div>                        <div class="alert alert-danger error"></div>                    </div>                </div>            </div>        </div>    </div>  


After the markup, write the javascript, with the references to the jQuery and to the Bootstrap javascript files:

When the "Details" button is clicked, we send an Ajax request containing the ID of the record (inside the URI ) to be displayed :


If the response was an 200 - OK, we fill all fields; elsewhere, we display an error message:


This is the code for the script:


 <script src="Scripts/jquery-2.1.1.js"></script>    <script src="Scripts/bootstrap.js"></script>    <script>        $(function () {            $("div.message").css("display", "none");            $("div.error").css("display", "none");
            $("input.btn[value*=Details]").click(function () {
                var id = $("input[name=ID]").val();                $.ajax({                    url: "http://localhost:6954/OData/Notes(" + id + ")",                    type: "GET",                    data: id,                    dataType: "json",                    contentType: "application/json",                    beforeSend: function (data) {                        //alert(id);                    },                    success: function (data) {                        var note = data;                        $("div.error").css("display", "none");                        $("div.message").css("display", "block");                        $("div.message").text("The Message with ID = " + id + " was retrieved successfully!!!");                        $("input[name=To]").val(note.To);                        $("input[name=From]").val(note.From);                        $("input[name=Heading]").val(note.Heading);                        $("input[name=Body]").val(note.Body);                    },                    error: function (msg) {                        var oError = JSON.parse(msg.responseText);                        fnError("Error : " + oError.error.innererror.message, id);                    }                })            });
            function fnError(msg, id) {                $("div.message").css("display", "none");                $("div.error").html("The message with ID = " + id + " does not exist. Try again.");                $("div.error").css("display", "block");            }


The action method which's inside the ODataController returns the required record:


Now, we need another $.ajax method to UPDATE the just EDITED record, using the HTTP PUT verb:


This is the code for copy-paste in your project:


            $("input.btn[value*=Update]").on("click", function () {                var id = $("input.form-control[name*=ID]").val();                var to = $("input[name=To]").val();                var from = $("input[name=From]").val();                var heading = $("input[name=Heading]").val();                var body = $("input[name=Body]").val();                var data = '{"ID":"'+ id +'","To":"' + to + '","From":"' +                    from + '","Heading":"' +                    heading + '","Body":"' + body + '"}';
                $.ajax({                    url: "http://localhost:6954/OData/Notes(" + id + ")",                    type:  "PUT",                     data: data,                    contentType: "application/json",                    dataType: "json",                    success: function (data) {                        $("div.message").text('The item was successfuly updated.');                    },                    error: function (msg) {                        $("div.error").html(msg.responseText);                    }                });            });        })    </script>

Here, we create an JSON object with all the data typed by the User, and send an Ajax HTTP PUT request to the OData Web API web service. Remember: HTTP PUT is for update ALL the fields of a record; while HTTP PATCH only updates part of the fields.

Run the application: the User gets the item's details, then EDIT all or PART of the data (there's no need of changing ALL the data, because we FILL the fields with the DETAILS brought from the web service, therefore ALL fields will contain some data), and clicks the second button, for updating the record:


The Ajax request reaches the web service, which we built in a previous tutorial about setting an OData v4.0 WebAPI with full and partial updating support (HTTP PUT & HTTP PATCH) that can be found here.
This is the Put() method which handles the HTTP PUT request at the OData service:

As you see, we just Update the item, but if the Model is not valid, we concatenate all errors in a string using SelectMany(), then Select() and then the Aggregate() Linq methods.

The item was updated. But, in case of error,  for example, if we don't comply with the data annotation for the "From"  property, which requires an email , we get the following error message:


The response 400 is because there are too many characters in the "Heading" field, as stated in the Model's Data Annotations:

Therefore we got the following response from the OData service:


That's all!!!!

In this article we've seen step by step how to create a web client which fully updates a record by sending an HTTP PUT Ajax request to an WebAPI OData RESTful service implemented with an MVC ODataController. The OData Web API  is built in the previous Web API ODataController tutorial. The Bootstrap's setup can be found  in this article.
Enjoy .....

By Carmel Shvartzman

עריכה: כרמל שוורצמן