Showing posts with label Web Services. Show all posts

Saturday, November 29, 2014

Step by step how to send an HTTP PUT Request to a RESTful WCF Service using Fiddler

In this post we'll learn how to send an HTTP PUT Request to a RESTful WCF application using Fiddler
We'll use Fiddler to test an RESTful WCF application, sending an HTTP PUT request. We'll start with a working WCF application,  and we'll update an entry using Fiddler, showing as follows :


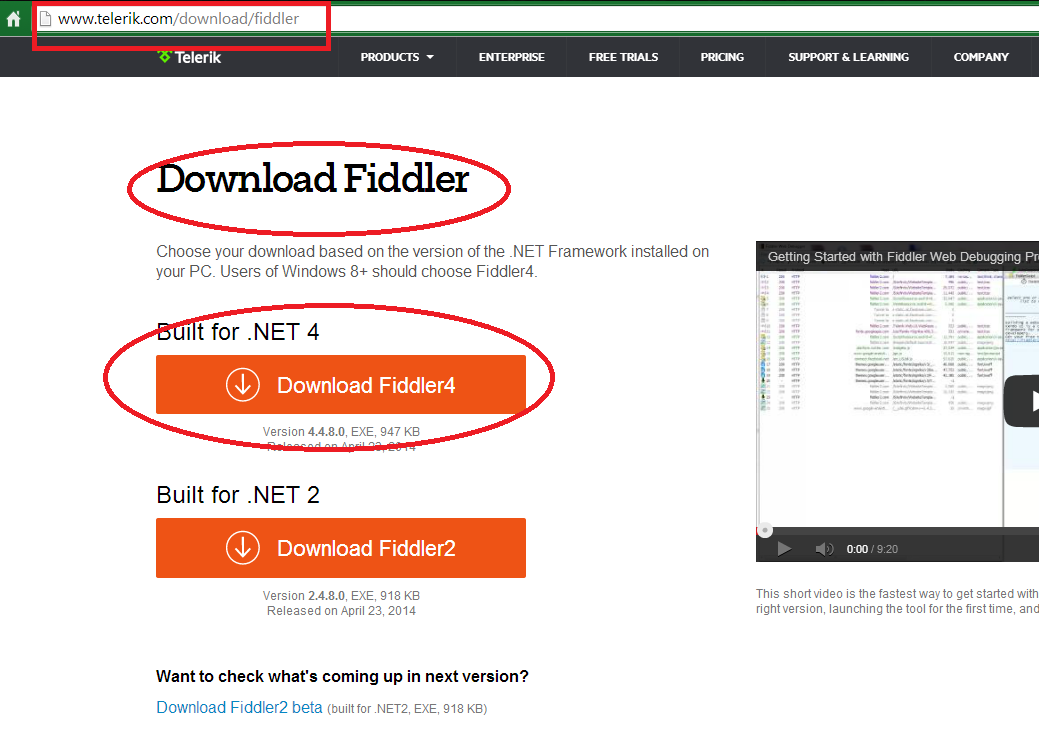
First of all, we have to download the FREE Fiddler tool from this web site :


After installing it , study the settings of the Operation Contract at the WCF Service Contract, in order to fill exactly what it is expecting as a request:
http put request to restful wcf using fiddler

The WebInvoke handles the PUT HTTP verb, and the request format must be JSON, and so the response format. Therefore, we'll send exactly what the WCF wants.
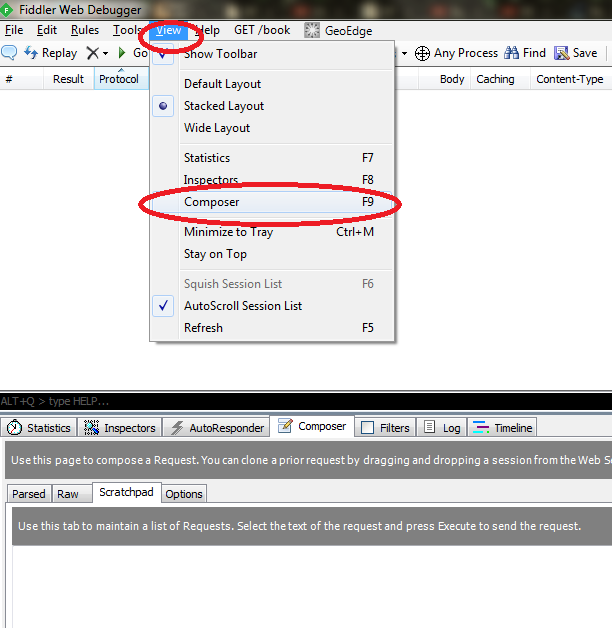
Open Fiddler and click the "Composer" option:


Then type in the URL and select "PUT" HTTP request method from the list. Also, set the request Headers as follows: (don't worry about the Content-Length, because Fiddler will fill  it for you):


Also, fill the Request Body :  be careful to fill adequately the field names of the Entity you want to update, most of all, the ID of the record to change.

Press the "EXECUTE" button at the Fiddler Composer, to send the request. If you set a breakpoint inside the WCF HTTP PUT handler, you'll see the bindings in action :


As you see, WCF succeeded at binding the JSON it got with the Blog object expected.
The response is then sent to Fiddler, with an "true" value:


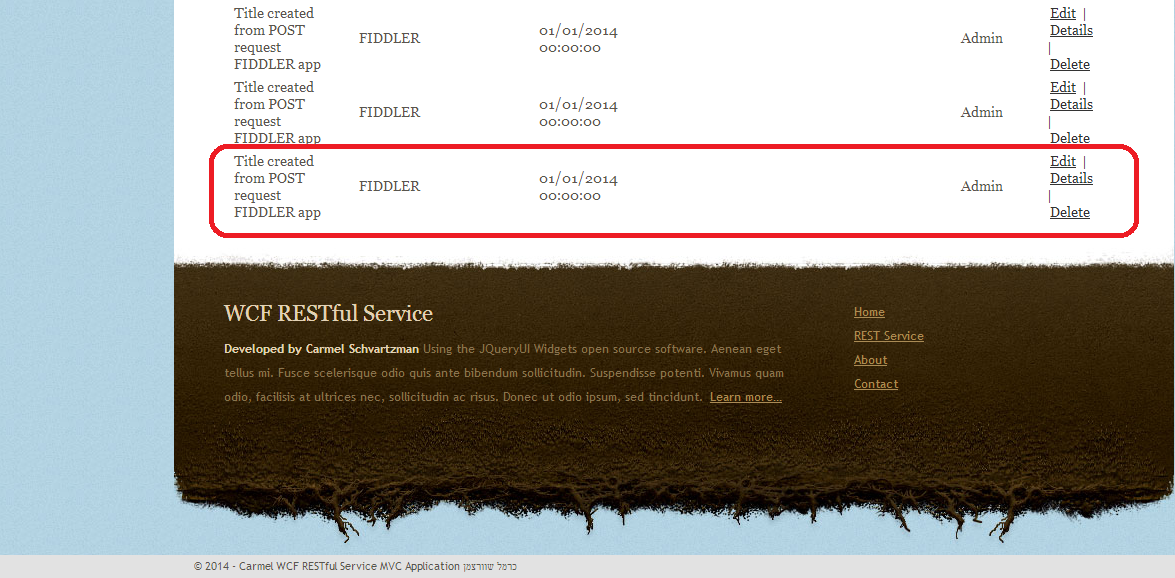
And the database shows the updated values:


If you want to take a look at the RESTful WCF which we're using here, see this tutorial.

That's all... 
In this tutorial we've learned how to send an HTTP PUT Request to a RESTful WCF application using Fiddler. 
Happy programming.....
      By Carmel Shvartzman
כתב: כרמל שוורצמן


Wednesday, November 19, 2014

How to expose a WCF Service through many endpoints and multiple bindings

  
In this post we'll explore how to expose one single WCF Service through many  endpoints and multiple bindings. We'll have only one C# WCF code, and we'll make it implement several interfaces in order to expose several endpoints with many different bindings. Technically, we'll create several WCF services via creating several interfaces, but the C# class implementing them will be running the SAME CODE. We'll enable that unique C# class code to handle both Soap and HTTP requests, proceeding from backends calls, from jQuery Ajax calls, and from standard HTTP web calls. Some calls will be made programmatically in C# from some Application Back-End . Other, REST calls, will proceed from Ajax or from regular web calls. But ALL requests will be handled by the SAME C# service class.

How to expose a WCF Service through many endpoints and multiple bindings


Another interesting feature of this exercise will be, we are not creating a WCF Application, but adding a WCF Web Service to an existing MVC application.
The schema of our WCF app will be as follows : one unique C# Class, which implements two Interfaces as Services Contracts, finally exposed through three Endpoints:
How to expose a WCF Service through many endpoints and multiple bindings


One of the Endpoints will handle Soap calls, one HTTP web calls, and another one Ajax HTTP web calls. The first one will use an basicHttpBinding, and the former two, an webHttpBinding.

The WCF service we are building will handle HTTP requests based on the REST (REpresentational State Transfer) architecture, designed by Dr. Fielding at 2000. Our WCF sample will receive HTTP requests depending what it intends to do:

1) CREATE an item :     HTTP "POST" request
2) RETRIEVE  an item : HTTP "GET" request
3) RETRIEVE  ALL items : HTTP "GET" request

We'll want to create an WCF Web Service with CRUD functionality, which fetches and persists all data proceeding from a RESTful Web Service, based on a Model as follows:


Step 1 - Add a WCF Service to your application


Step 2 - Write the C# code for the WCF Service


[AspNetCompatibilityRequirements(RequirementsMode = AspNetCompatibilityRequirementsMode.Allowed)]
    public class BlogService : IBlogService,IBlogService1
    {
        public string GetBlogs()
        {
            Models.BlogEntities ctx = new Models.BlogEntities();
            ctx.Configuration.ProxyCreationEnabled = false;
            List<Blog> data = ctx.Blogs.ToList();

            return new JavaScriptSerializer().Serialize(data);
        }

        public string GetBlog(string Id)
        {
            Models.BlogEntities ctx = new Models.BlogEntities();
            ctx.Configuration.ProxyCreationEnabled = false;
            int id = Convert.ToInt32(Id);
            Blog data = ctx.Blogs.Where(b => b.BlogID == id).FirstOrDefault();

            return new JavaScriptSerializer().Serialize(data);
        }

        public string CreatePost(Blog post)
        {
            Blog responsePost = post;
            return new JavaScriptSerializer().Serialize(responsePost);
        }
    }

Why do we create first the service implementation and after that the interfaces? Because we know exactly what our class is supposed to do, but only later we'll decide how many Service Contracts we'll need.

Step 3 - Create the C# interfaces as Service Contracts

In this example, we create two Service Contracts through two Interfaces: the first one look this way:


[ServiceContract]
    public interface IBlogService
    {
        [OperationContract]
        [WebGet]
        string GetBlogs();
        [OperationContract]
        [WebGet]
        string GetBlog(string Id);
        [WebInvoke(Method = "POST")]
        [OperationContract]
        string CreatePost(Blog post);
    }

The second one is similar but has the Operation Contracts names changed:


[ServiceContract]
    public interface IBlogService1
    {
        [OperationContract(Name = "GetBlogsSoapREST")]
        [WebGet]
        string GetBlogs();
        [OperationContract(Name = "GetBlogSoapREST")]
        [WebGet(UriTemplate="GetBlog1/{id}")]
        string GetBlog(string Id);
        [WebInvoke(Method = "POST")]
        [OperationContract(Name = "CreatePostSoapREST")]
        string CreatePost(Blog post);
    }

Then, we make our Service Class to implement the Interfaces:


Step 4 - Declare the WCF Service & its Endpoints

At the web.config, declare the service with its service behavior:


This service behavior states that the service metadata can be fetched , using the declaration:

<serviceBehaviors >
        <behavior  name="MultipleInterfacesAndEndpointsSvc" >
          <serviceMetadata httpGetEnabled="true"/>
          <serviceDebug includeExceptionDetailInFaults="true"/>
        </behavior>
      </serviceBehaviors>

Also we want that , at this development stage of our application, the errors could be view by us:
includeExceptionDetailInFaults="true"

Now we create three Endpoints:


 <service name="WCF_RESTful.BlogService" 
               behaviorConfiguration="MultipleInterfacesAndEndpointsSvc" >
       <endpoint 
         address="RESTfulAjax" 
         behaviorConfiguration="RESTfulAjaxBehavior"  
         binding="webHttpBinding" 
         contract="WCF_RESTful.IBlogService" />
        <endpoint 
          address="RESTfulNoAjax" 
          behaviorConfiguration="RESTfulNoAjaxBehavior"
          binding="webHttpBinding" 
          contract="WCF_RESTful.IBlogService1" />
        <endpoint 
          address="SoapEndpoint"  
          binding="basicHttpBinding" 
          contract="WCF_RESTful.IBlogService1" />
      </service>

The first two are for REST calls, that's why we use webHttpBinding. Each one exposes a different Service Contract (interface).
The last is for Soap calls, and therefore uses basicHttpBinding.
Now , to handle regular HTTP REST calls, we need to bind a "webHttp" behavior to the Endpoint:


 <behavior  name="RESTfulNoAjaxBehavior" >
          <webHttp />
        </behavior>

And to handle Ajax web calls, we declare another behavior using "enableWebScript", which also includes the "webHttp" directive:

Step 5 - Routing

Finally, reroute the path since we are inside an MVC application:

routes.IgnoreRoute("BlogService.svc/{*pathInfo}");


Build & run, and let's call our WCF from :
1) Soap request: we create a service reference in some MVC application, and discover our WCF with its methods:

The WSDL schema appears as this:


Now, just build the back end client Proxy and use the service.

2) Web HTTP REST request: XML response : 


And for getting just one record :


As you see, the response is given in XML format. Notice that we needed to call an "GetBlog1" method: that's because we defined an UriTemplate at the Operation Contract , and because of the format "GetBlog1/{id}" we don't need to specify the "GetBlog1?id=4" argument: 


3) Ajax REST HTTP request: Json response : 


Here, the response is Json. And to get only one record:


That's all!! 
In this tutorial we've learn How to expose a WCF Service through many endpoints and multiple bindings.  

Happy programming.....
      By Carmel Shvartzman
כתב: כרמל שוורצמן

Monday, September 15, 2014

Step by step how to design a RESTful WCF Service inside an Asp.Net MVC application


In this article we'll create a WCF RESTful service inside an Asp.Net MVC application , with support for all CRUD operations (Create - Retrieve - Update - Delete), handling the HTTP GET, PUT , POST & DELETE verbs
For this tutorial, we'll  create a WCF RESTful application that will handle HTTP POST - HTTP PUT & HTTP DELETE requests.  A simpler tutorial including only HTTP GET  requests can be found HERE.
The REST architecture relies upon handling HTTP requests according to this methods : GET for reading data, POST for creating a new record, PUT for updating ALL the fields of a record, MERGE (or PUT again) for updating just part of the fields of some record, and DELETE for removing a record.
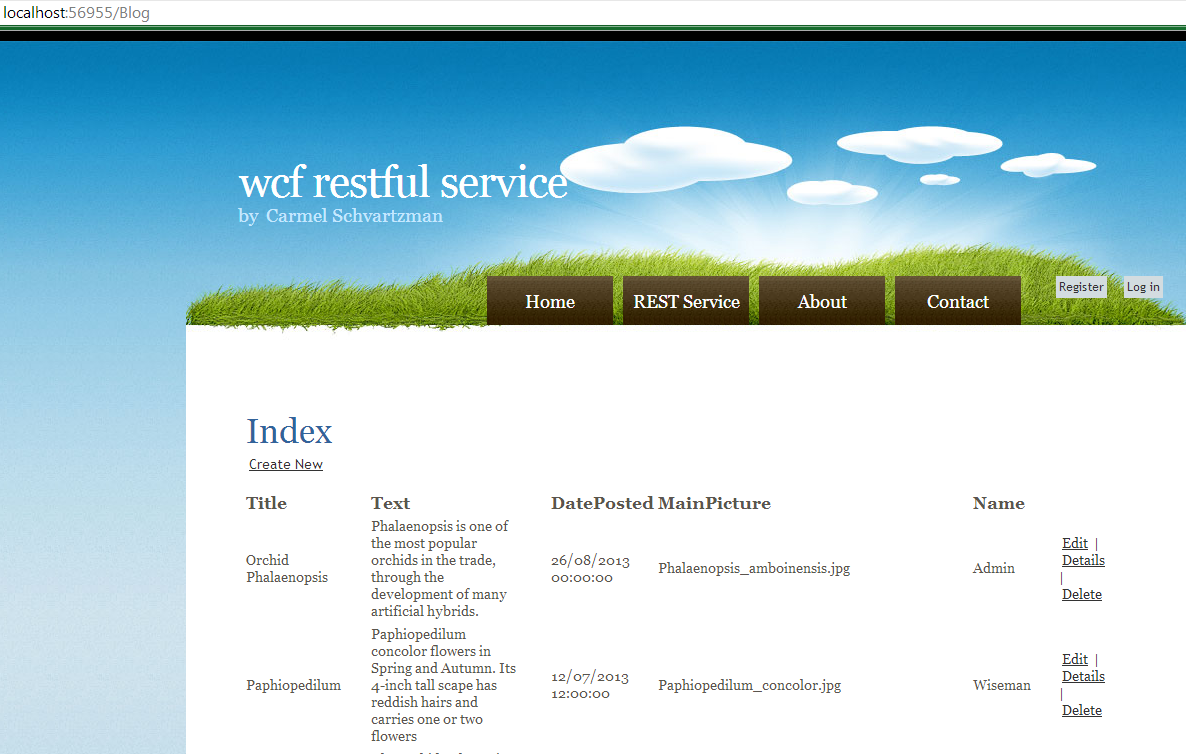
We'll see the data modifications at an MVC application, which will use an SQL database represented by the Entity Data Model EDM, showing as follows:


We'll add to that MVC application a WCF Web Service to fetch and preserve data & render it in JSON format.
Now add a new item to your project :

Search for all WCF items, and select AJAX-enabled WCF :


Open the web.config created: you'll recognize an ENDPOINT BEHAVIOUR to enable Web Script , that means, AJAX jquery calls, and a webHttpBinding  (for REST purposes)  ENDPOINT linked to a CONTRACT named "BlogService" :


The "<enableWebScript>" allows our RESTful WCF service to be accessed through AJAX calls, and this option includes also the "<WebHttp>" directive, which transforms the WCF service in RESTful, based on HTTP verbs which determine the CRUD operation to perform (PUT for update, POST for create, GET for  retrieve, DELETE for remove).
Because at the present we don't want the RESTful WCF service to handle AJAX requests, we'll replace it with the  "WebHttp" directive in the Endpoint Behavior:
Here i added a Service Behavior just to see the errors , but you can delete the behavior if you want.

Because we are inside an MVC application, we must tell MVC to ignore the route to the WCF: add this code to the RouteConfig.cs  file, at the "App_Start " folder:


Open that "BlogService" class : it have got an SERVICE CONTRACT attribute :


Delete the function , and create our own Service Contract with this Interface for ALL CRUD operations:

[ServiceContract(Namespace = "")]
    public interface IBlogService
    {
        [OperationContract]
        [WebGet(ResponseFormat = WebMessageFormat.Json)]
        List<Blog> GetPosts();
        [OperationContract]
        [WebGet(ResponseFormat = WebMessageFormat.Json)]
        Blog GetPost(string Id);
        [OperationContract]
        [WebInvoke(Method = "POST",
            RequestFormat = WebMessageFormat.Json,
            ResponseFormat = WebMessageFormat.Json)]
        bool CreatePost(Blog post);
        [OperationContract]
        [WebInvoke(Method = "PUT",
            RequestFormat = WebMessageFormat.Json,
            ResponseFormat = WebMessageFormat.Json)]
        bool UpdatePost(Blog post);
        [OperationContract]
        [WebInvoke(Method = "DELETE",
            RequestFormat = WebMessageFormat.Json,
            ResponseFormat = WebMessageFormat.Json)]
        bool RemovePost(Blog post);
    }


Notice we serialize the data to JSON using the Request/Response Format. Also, we set the "WebInvoke" to POST, PUT & DELETE. And the return of the web HTTP GET methods is a LIST<> or a Blog object, always in JSON format.

Now we implement the Service Contract with the following class:

[AspNetCompatibilityRequirements(RequirementsMode = AspNetCompatibilityRequirementsMode.Allowed)]
    public class BlogService : IBlogService
    {
        BlogEntities ctx;
        public BlogService()
        {
            ctx = new Models.BlogEntities();
            ctx.Configuration.ProxyCreationEnabled = false;
        }
        public List<Blog> GetPosts()
        {
            List<Blog> data = ctx.Blogs.ToList();
            return data; 
        }

        public Blog GetPost(string Id)
        {
            int id = Convert.ToInt32(Id);
            Blog data = ctx.Blogs.Where(b => b.BlogID == id).FirstOrDefault();

            return data; 
        }

        public bool CreatePost(Blog post)
        {
            ctx.Blogs.Add(post);
            
            return ctx.SaveChanges() == 1;
        }

        public bool UpdatePost(Blog post)
        {
            Blog oldPost = ctx.Blogs.Where(b => b.BlogID == post.BlogID).Single();
            oldPost = oldPost.Merge(post);
            ctx.Blogs.Attach(oldPost);
            ctx.Entry(oldPost).State = System.Data.EntityState.Modified;
            return ctx.SaveChanges() == 1;
        }
        public bool RemovePost(Blog post)
        {

            ctx.Entry(post).State = System.Data.EntityState.Deleted;
            return ctx.SaveChanges() == 1;
        }
    }

    public static class Utils
    {
        public static Blog Merge(this Blog post, Blog modified)
        {
            if (modified.Title != "")
            {
                post.Title = modified.Title;
            }
            if (modified.Text != "")
            {
                post.Text = modified.Text;
            }
            return post;
        }
    }

Notice we add the statement "proxycreationenabled" = false, at  the instantiation of the Entities Model. That's to avoid being faced with an exception:


That error is called "CIRCULAR REFERENCE WAS DETECTED WHILE SERIALIZING AN OBJECT OF TYPE" :


Also, notice that i coded an extension method to MERGE the original record with the updated one.

Now open the browser and test the GetPosts method:


Do the same for the GetPost method:
Now we test the RESTful WCF service with HTTP POST, PUT and DELETE requests, using Fiddler (You can learn Fiddler in this tutorial.).

We'll start with the HTTP POST request. Check the HTTP POST method handler; it expects an object of Blog type, that means that we'll send a POST request containing an JSON object (as specified at the Operation Contract, inside the interface) using Fiddler. WCF will automatically try to bind the JSON object to the Blog object, according to the field names:


Type the URL with the service name and the operation name, and select the "POST" method from the list:

Also, set a Content-Type as "application/json". The Content-Length is filled by Fiddler. Insert a breakpoint at the WCF to see the binded Blog post:


Then you can see the response at Fiddler:


Next, we'll test the WCF with an HTTP PUT request. At the Fiddler Composer, enter the URI and select
 the "PUT" option:

Here is very important to send to the WCF web service the ID of the entry to update, together with the fields to change. Take care to respect the JSON notation : { "key":"value" ,  "key":"value" }
At the WCF operation, set a breakpoint:


 The second line of code contains a call to the Merge() extension method, which checks for every modified field and updates it at the original object:

As you see, the old entry has been modified:


We attach the modified entry to the context, and set the state as "modified":

Then Fiddler gets the response:


We could also have sent a response containing an "OK" or "CREATED" status, as follows:

        return new HttpResponseMessage(HttpStatusCode.OK);
        return new HttpResponseMessage(HttpStatusCode.Created);

Just change the return type from bool to HttpResponseMessage.
In case of problem we could send this instead:

      return new HttpResponseMessage(HttpStatusCode.BadRequest);
      return new HttpResponseMessage(HttpStatusCode.NotFound);


Finally, we'll remove an entry. All that the operation does is to set the state as "deleted", so that SaveChanges() will erase it from database:


Create the HTTP request at Fiddler, as before, but selecting "DELETE" :


Take care of sending the ID of the entry to remove. Rest of the fields are just optional, you don't need to set them:

As you can see at the Headers, the HTTP DELETE got a response of "true":


Again, we could also have sent a response containing an "OK" status, as follows:

        return new HttpResponseMessage(HttpStatusCode.OK);        

Just change the return type from bool to HttpResponseMessage.

We have tested our RESTful WCF service.
You can see more about sending HTTP requests from Fiddler in this tutorial.

That's all
In this post we've seen how to create a WCF RESTful service with support for all CRUD operations in Asp.Net MVC in 15 minutes. 

Happy programming.....
    By Carmel Shvartzman
כתב: כרמל שוורצמן