By Carmel Schvartzman
In this tutorial we'll learn how to use the most common HTML Helper, the TextBox control, in an MVC View in ASP.NET MVC 4. An MVC View is the responsible for rendering the html for the UI with the user: it is the Presentation level in the ModelViewController software pattern; if so , it is absolutely forbidden to include in it any bussiness logic (wich is holded into the MVC Model) or any application logic (coded inside the MVC Controllers), nor any data fetching(MVC Model responsability, sent via the Controllers).
By convention, the Views are stored inside subfolders of the View folder, named after the corresponding Controllers: then for instance, all the Views you create related to the AccountController will be placed inside the "Account" folder ("Views/Account"). The MVC framework will search a required View to be rendered, in the folder with the name of the Controller, and if it is not there, will search at the "Shared" subfolder. If you want a View to be shared among several Controllers, place it in the "Shared" folder.
A View is just a class called ViewPage: it inherits from the Page class and also implements the IViewDataContainer, in order to hold all the data sent by the Controllers inside its ViewDataDictionary.
We can also send data to the View using the ViewBag dynamic dictionary, which internally uses the ViewData dictionary to store the key/value pairs, and it is an advantage because in the ViewBag case we don't need to cast the values. There is of course the disadvantage of ViewBag being late binded and therefore we don't have compile time checking but runtime errors instead. There is another useful collection named TempDataDictionary, similar to the former, with the difference that it persists ONLY between the current request and the next request (unless you mark the key to be persisted more than that, using the Keep() method). This is useful while passing data between Action methods, or in case of errors.
In this tutorial we'll learn how to use the most common HTML Helper, the TextBox control, in an MVC View in ASP.NET MVC 4, getting the following UI results:
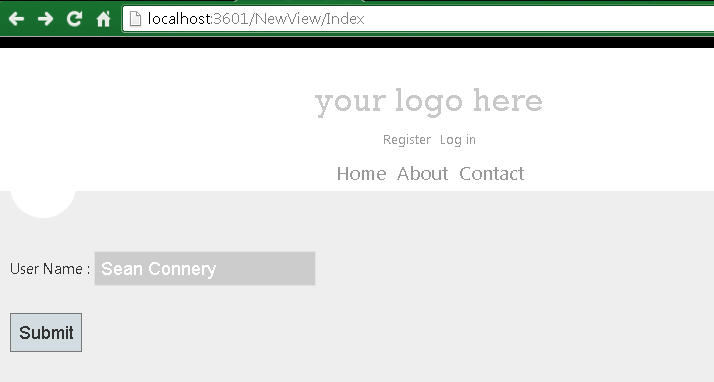
To use the HTML Helpers we must create our own View, so first let's create a new Controller called "NewViewController", and then add a View to the Index Action method. So right click over the Controllers folder, and add a new Controller:

Name it "NewViewController", and select the template "Empty MVC Controller":

Open the Controller file and find the "Index" Action method:

Right click on it and select the option "Add View":

On the dialog, let the name be "Index", select the "ASPX" View engine, and choose a master page:

The first HTML Helpers we'll learn about are the TextBox control and the Label. For the other HTML Helpers, refer to the "Categories" Menu in the top-right place in this Blog. Open the View we just created, and type the TempData["message"] in order to display a message:

Create the Form object taking care of its tags:

Also, add a button in order to submit the form:

Now, add the label which will inform the user what is the text box about. We'll send the title text from the Action method on the server side:

Next, type the following code to display a TextBox:

The first argument the TextBox Helper gets is the name of the control: this name is the one which will identify it when the request is sent to the web server. The second argument is the text that the TextBox will display before the user types something in it. Setting it as "null" forces the MVC framework to search inside the ViewDataDictionary for some key named as the control: this way we'll send the text from the Action method on the server side. The last argument is an annonimous object which contains the style of the control.
Now let's set the Action method linked to this View. Go to the "NewView" Controller and search for the Index Action method, adding to the ViewDataDictionary the values to populate the title and the textbox control:

Now build the application and run without debugging:
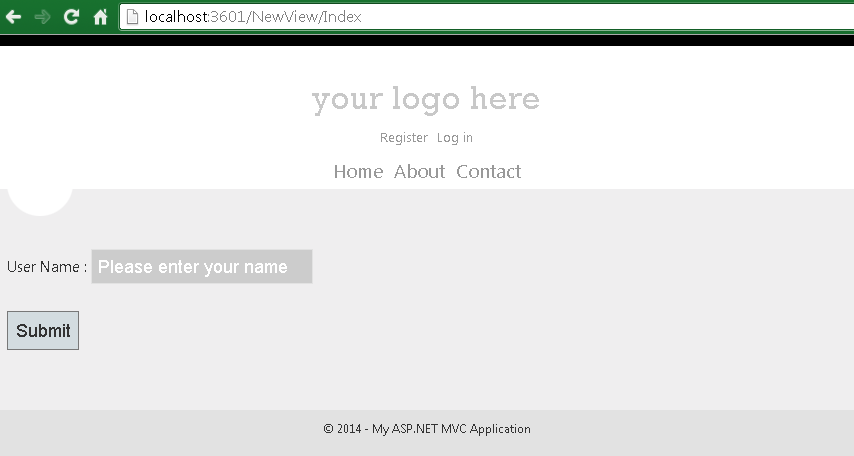
As you can see, we get the title and the textbox. Open the Developer's Tools ( F12 ) and refresh the web page:

You can see in the "Network" tab, that an HTTP GET request has been sent to the web server.
Enter your name, and press the submit button:

This time, an HTTP POST request has been sent by the Form. Therefore we'll handle the request by creating an Action method which processes it and uses the same View. To handle the request, add the GetVerb and the ActionName Attributes with the following arguments:

We're just instructing the MVC framework that this is the Action method that handles POST requests, and gets the input data in the "txtUserName" textbox. Notice that the name of the parameter MUST BE EXACTLY the same of the TextBox control in order to get the data. Now we'll render a message to the client side using the input data received from the browser:

Rebuild the application, go to the browser , and type your name:
We get the message telling the user that everything went OK:

In this tutorial we've learned how to use the most common HTML Helper, the TextBox control, in an MVC View in ASP.NET MVC 4, sending to it data via the ViewDataDictionary, and the TempDataDictionary.
That's all!!
Happy programming.....
כתב: כרמל שוורצמן


