In this post we describe Step by step How to Build a customizable jQuery Plugin for HTML5 Form.
In this article we create from scratch a custom jQuery Plugin to display an HTML Form with text, file, number, email, etc input types and radiobuttons at your wish, using Twitter Bootstrap CSS3 styles . The Form will contain any input types (text, email, number, date, color, file, hidden, datetime, button) and labels as you wish, being fully customizable.The complete code can be found in this GitHub repository:
https://github.com/CarmelSoftware/jQueryPlugin_CustomizableForm
Our jquery plugin will shows an HTML5 form as follows:


How to Build a customizable jQuery Plugin for HTML5 Form
First , we have to reference to the jQuery and the CSS3 Bootstrap style files, so browse to http://jquery.com/download/ and to the Bootstrap's official web site to get the latest versions of the frameworks in CDN(Content Delivery Network):


Add the references to the head element in a new HTML5 file :

Notice that we also included inside the "head" tag two new files: one for the style , and the other one will hold our jQuery plugin.
Next, we code a div to contain the web Form produced by our jquery plugin:

After the body element, append a script element to call our plugin:
Now, go to the "jqueryplugin.js" javascript file and write the plugin definition as follows:

The $.fn.Form is our jQuery plugin, and the defParams will hold the defaults to construct it, as follows:

Why? In case the plugin get no parameters, we apply the defaults.
Else, we merge the received arguments with the defaults, using the jQuery $.extend() method as this:

Now we add the HTML5 Form to "this", which is the container where our plugin will be located:

We included a Bootstrap class for the style, and the action where to send the request will be set by the user.
We add a Title to the Form:

And a first div, which will hold all input elements:

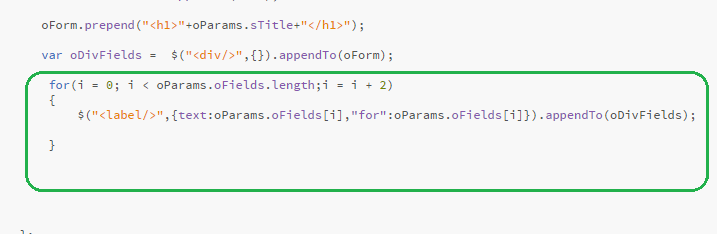
Now we make a loop for craeting the labels for the Form's fields, following the oFields array:
Next, we build all input elements according to the array oFields, which contains them in the form of element-name + element-type : "Attachment","file" :

Then, we do the same for the array of radio buttons, inserting input radiobuttons and its labels, by looping on the oRadio array and appending them to a new <div> element::

Finally, we append another <div> with two buttons, a Reset and a Submit one:

At the end of our jquery plugin, we type a return expression , to allow jquery chaining on our custom plugin:
return this;
And our runtime made HTML Form will appear as this:

Also, we code the following CSS3 style to the styles.css file:

Hoping this post was useful to you,
by Carmel Schvartzman
כתב: כרמל שוורצמן
No comments:
Post a Comment